.................................. Return to Sumner's Home Page....
Return to N Scale RR Main Menu........ Return to Decoder Install Menu
=========================================
..............Previous Page..............................Next Page If There Is One
=========================================
…....--- FM H-10-44 & FM H-20-44 Shells on Atlas Chassis ---.....
--- TCS VO-1000 decoder & Digitrax DZ123 In Atlas VO-1000 ---
=========================================
This is decoder installs in a couple Atlas VO-1000 frame's. The two shown are on Atlas VO-1000 frames that were used under Shapeways F-M shells. I was trying to find F-M H-10-44 and H-20-44's in UP colors but no luck, but found the Shapeways shells so went that way since they fit Atlas VO-1000 frames. I will have to paint them.
I also have another VO-1000 in UP colors that came with a DCC decoder as I needed a UP VO-1000.
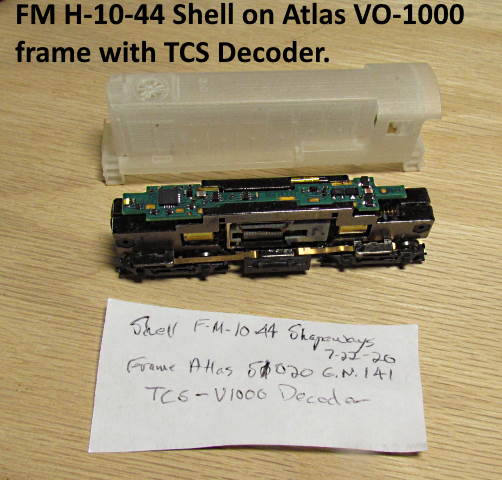
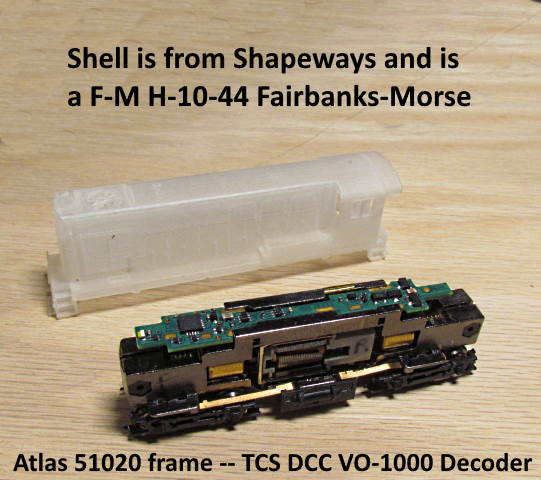
Above is a VO-1000 frame with the TCS VO-1000 drop-in decoder. This is a straight forward install so I won't go into it here.
I bought the loco as a Great Northern VO-1000. I want UP but the GN was ok as I only wanted the frame to put the FM H-10-44 shell on.
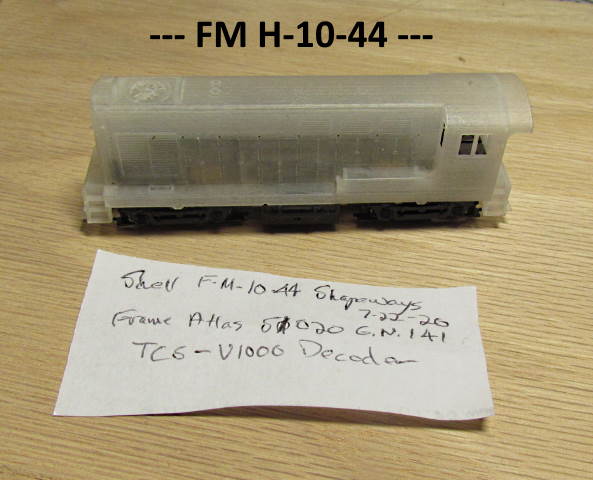
Here is is with the shell on the frame. Hopefully I'll finish this project at some point.
===============================
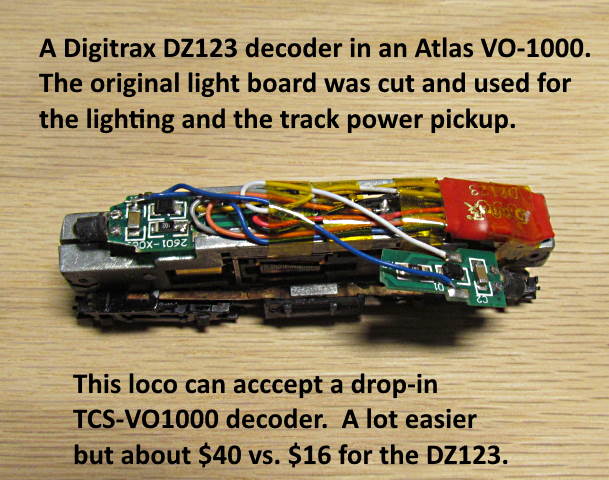
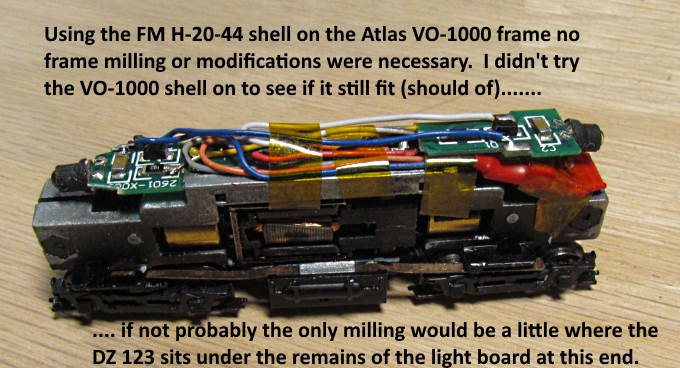
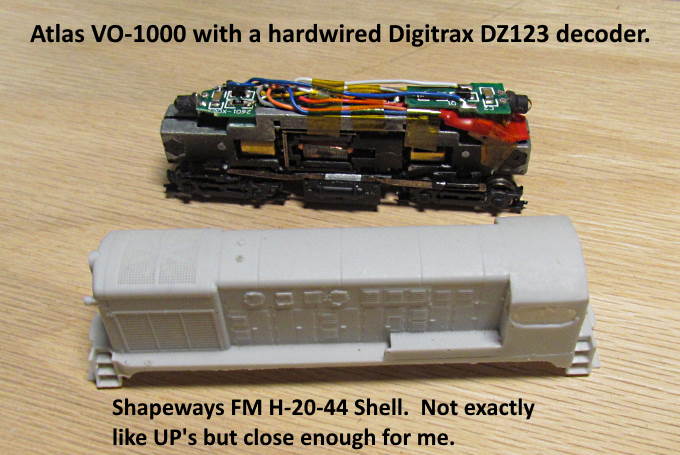
I needed another Atlas VO-1000 frame to make up a UP FM H-20-44 using another Shapeways shell. I found another used Atlas VO-1000 and used that shell for this hardwired decoder install. I could of used a TCS drop-in decoder in it also but wanted to try using a Digitrax DZ123 which is well under half the cost of the TCS decoder and I've been happy with them so far.
This was harder than the drop-in decoder install but still fairly easy as I didn't have to modify the frame at all.
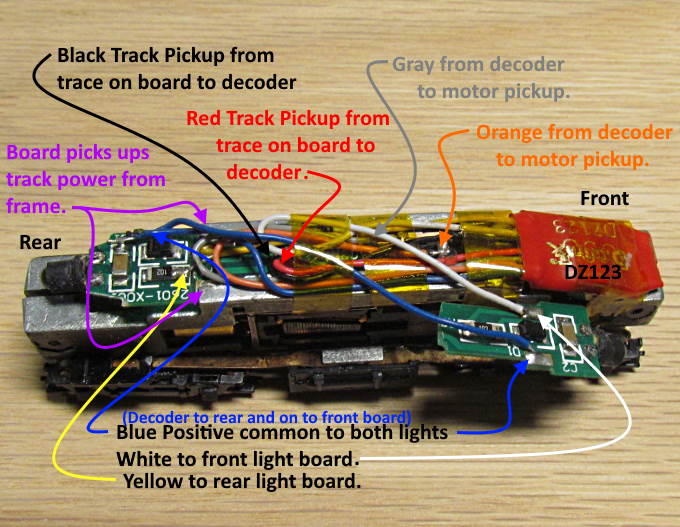
I cut the stock light board in half and used the back half as my track power pickup for the decoder. I found the two traces that came off of the contacts where the board slides into the frame and used the right side for the red positive decoder wire and a trace for the left side for the black decoder wire.
The decoder's orange and gray wires were soldered to the corresponding leads off the motor which you can get to on the top of the frame. Shown above but a little hidden in the picture. Sorry but I forgot to take pictures as I did this install so only have the finished ones.
I ran the common blue positive to both light boards (the original cut in half) and also the white and yellow control wires on the negative side of the LED's from the decoder. I used the stock LED's and resistors that are on the boards.
I used kapton tape to hold things in place. I didn't try putting the VO-1000 shell back on so not sure if it will go all the way down but if it doesn't only minor clearancing would be required by the DZ123 to make it sit in that pocket better. The H-20-44 shell fits with no problems.
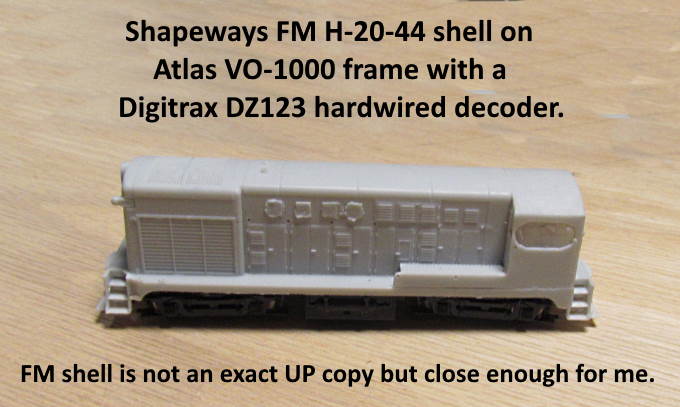
Above we see the Atlas chassis, decoder and shell together.
The shell doesn't look exactly like some of the pictures I have of a UP FM H-20-44 but will be close enough for me.
=========================================
...........................On..............e.........Next Page If There Is One