.................................. Return to Sumner's Home Page....
Return to N Scale RR Main Menu........ Return to Decoder Install Menu
=========================================
...............Previous Page.............................Next Page If There Is One
=========================================
--- ESU LokSound for Atlas N Scale '95-'96 GP7/9's – Pt. 1---
============================================
Going to need two identical trains for my coal mine complex scene. Almost identical except one will have all the cars empty and the other will have all the cars loaded with coal. The loaded one will replace the empty one under the coal loading chutes out of sight. I want to run a three engine consist for both. The two lead engines will be UP GP7'S and there will be a SP GP 7 towards the middle of both trains.
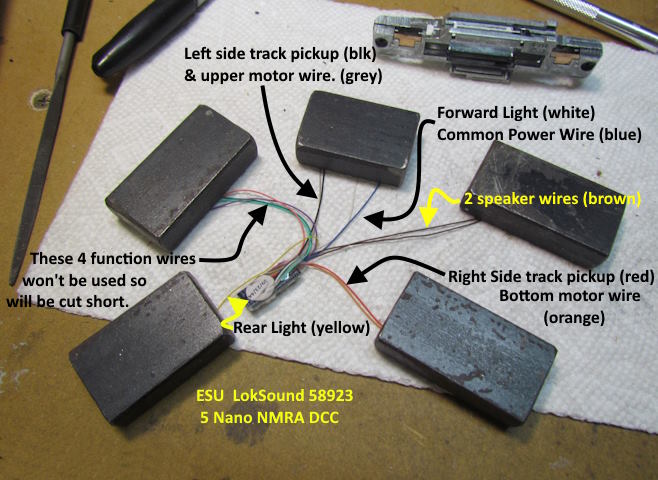
The head engines will be sound using an ESU LokSound 58923 5 Nano NMRA DCC decoder with a GP7 sound file. The other two engines for both trains will be non-sound with LokPilot 58926 5 Micro DCC decoders. The following 3 part series will document putting the LokSound decoders in the 2 engines that will be at the head of both trains then I'll cover the LokPilot decoder installs which should be a lot easier.
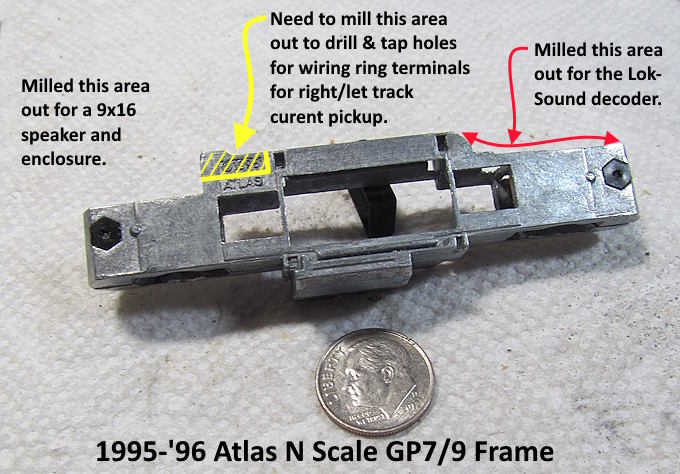
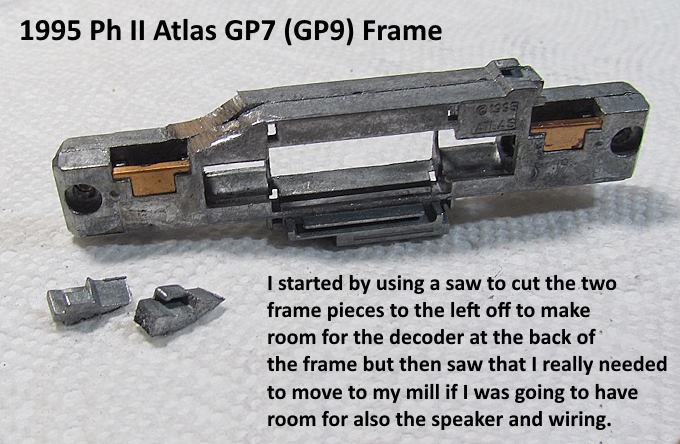
NOTE: These were the Ph. II frames that came out in '95'96 and replaced the previous frames where the wheel base was all screwed up. These frames are not the DCC 'Friendly' ones that came out later in the 2000's. They had small front and rear light-boards.
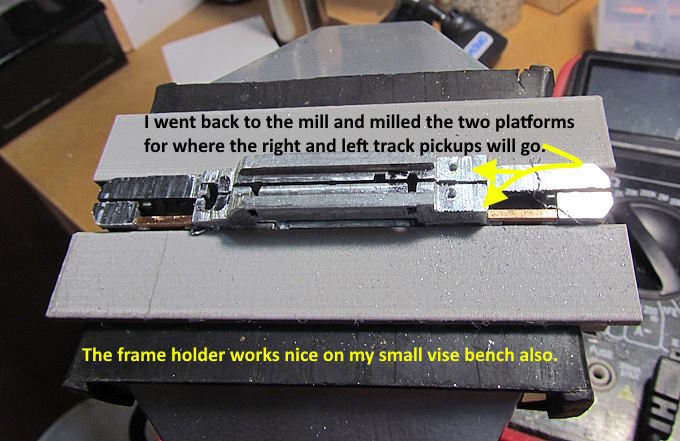
I soon realized that I had to remove a lot of material if I was going to get a 9x16mm speaker and enclosure in the cab area and the decoder at the rear along with the wiring. I ended up removing all of the 'yellow' areas.
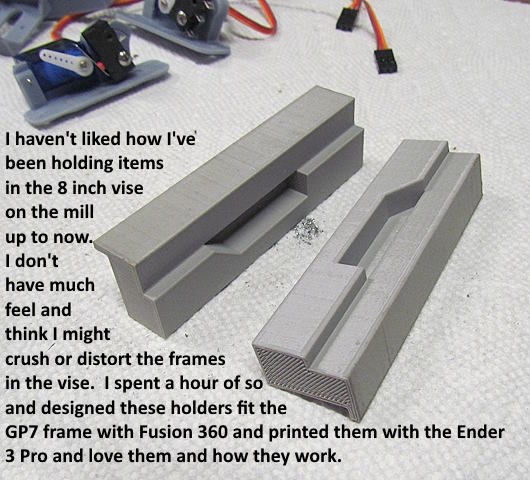
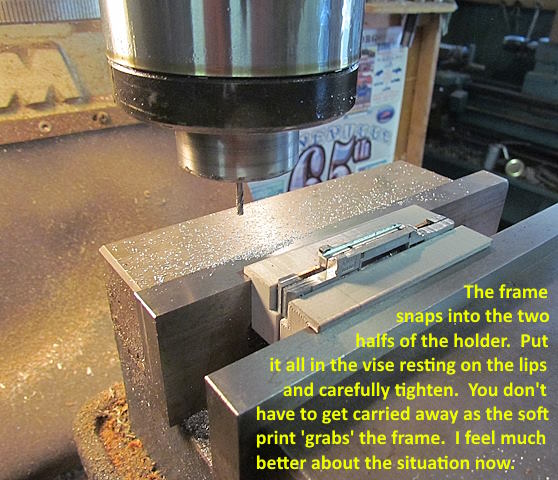
I designed the 'frame holders' shown above and they ended up being a way better way than how I was holding frames in the mill before. You can find more info on the frame holders and a link to the print files ( HERE ).
.
It isn't shown well above but both of the areas above where those bearing holders are was milled down to those holders.
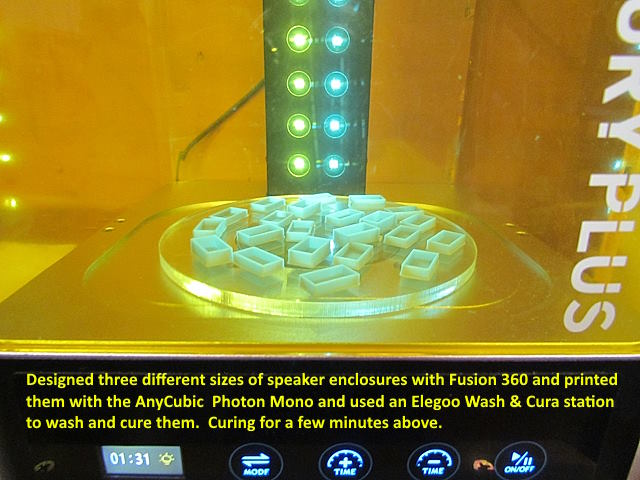
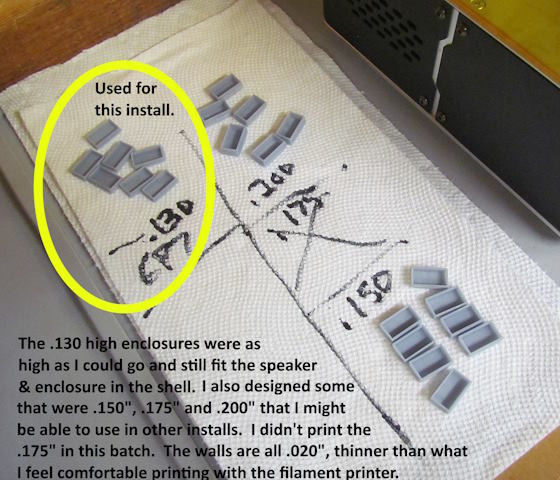
I put off using the AnyCubic Photon Mono resin printer for a couple years. I shouldn't of done that as it has come in handy as soon as I started using it. The key for me was spending $130 on the Elegoo 'wash-n-cure' station. It makes it super easy to wash and cure the parts. Put them in the wash container (goes where the speakers are above) and the parts are washed with the station in less than 4 minutes. Take them out and replace the wash container with the circular platform above and turn on the 'cure' for 2-4 minutes and you are done.
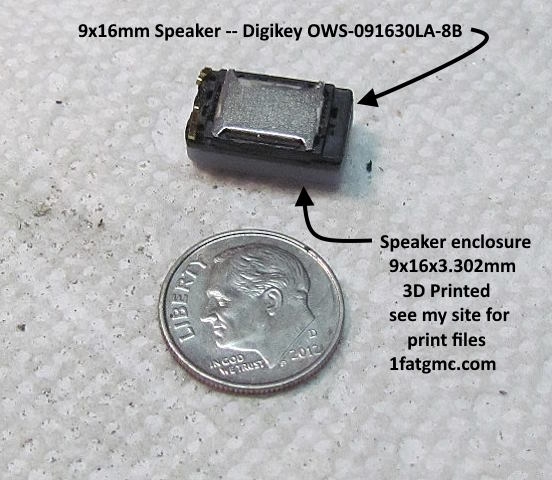
You can find the files for the speaker enclosures shown above and more on my thingiverse.com account ( HERE ).
.
.
.
Above you can see how I lower the areas above the truck towers about as much as I could and needed all of that.
Next Pt 2.......
=========================================
...........................On..............e.........Next Page If There Is One