.................................. Return to Sumner's Home Page....
Return to N Scale RR Main Menu........ Return to 3D Printed Objects Menu
=========================================
..............Previous Page.......................................Next Page If There Is One
=========================================
…................cale Fencing ------ N Scale Fencing ---
=========================================
You can find all the files to 3D print this object and others on my thingiverse.come account ( HERE ).
I was motivated to doing the fencing options below by work that Josh Murrah had done and pasted on thingiverse.com ( HERE ). He put up his file for fencing that he designed and printed with a resin printer.
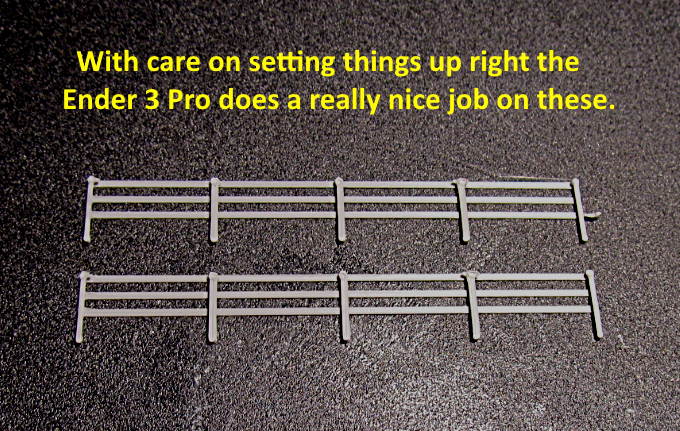
I have an Ender 3 Pro FDM printer and when I printed the fence it came out flat and with the horizontal railing and the posts the same widths. His pictures show otherwise so your results might be more like his than what I got when I printed. I roughly used his idea and designed three versions of a 40 foot N scale fence with 10 foot sections.
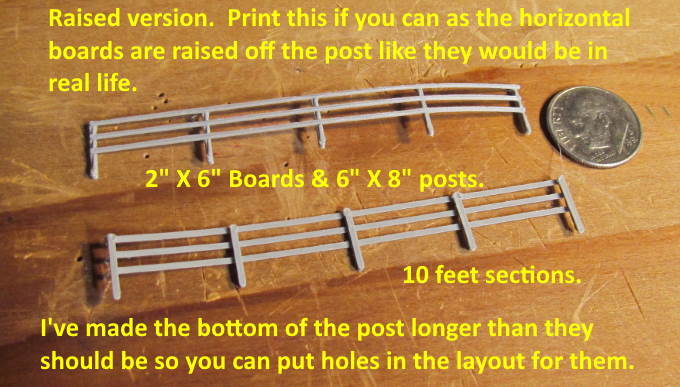
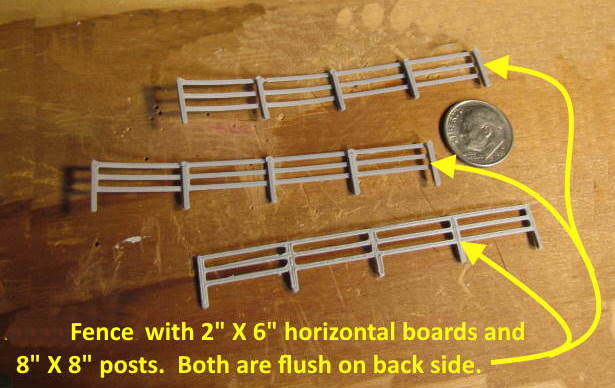
I designed two basic versions of the fence and use 2” X 6” scale boards for the horizontal railing and 8” X 8” posts. The bottoms of the posts are longer than what a fence would be. They are longer for mounting purposes in the layouts surface. Cut them to fit the length you need.
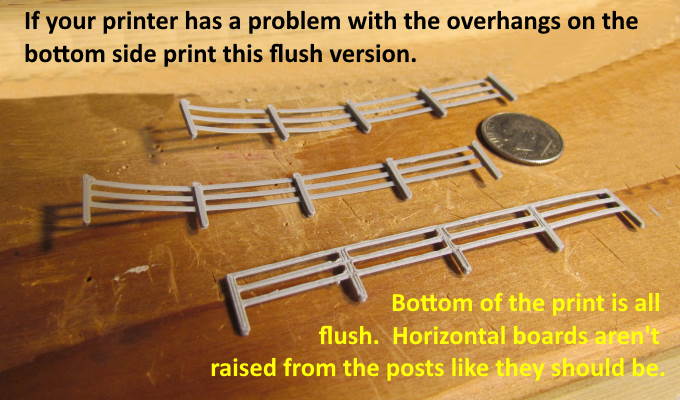
The picture above and the next one show the 'Flush Board' version of the fence. It is printed flat on the printer's table and the back side of the fence is all flat with the horizontal boards flush with the back of the posts. This wouldn't be typical if the boards were nailed to the posts. I thought I'd have to print it this way for the print to work.
Printing flat on the one side means you don't need any supports for the areas above the table. I'd try the version below first with your printer and if it works use it as it is more real to life. If it doesn't work then try this version as you still get the depth looking at the fence from one side and maybe on your layout you will only be seeing it from one side.
The 'Raised Board' prints with the horizontal boards showing up on top of the posts on one side of the posts like a fence would normally be built. The problem with printing like this normally is that the printer has to lay down filament over areas where there is no support underneath. In this case the bottom of the posts and the area where the posts span from board to board.
I decide to try it and was surprised that the Ender handled it quite well. You results might vary.
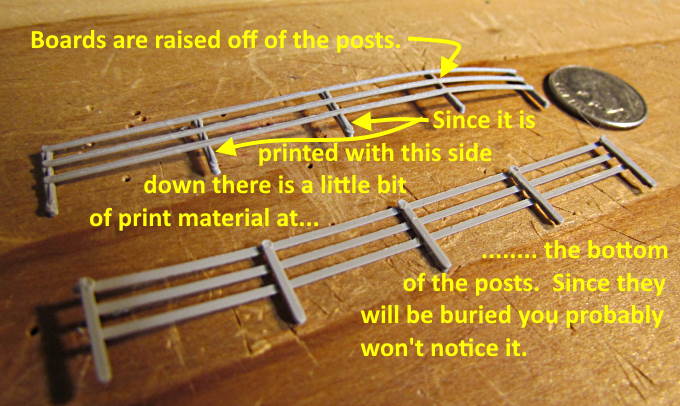
There is a little sag in the print material at the bottom of the posts but nothing really visible between the boards like I thought there might be. Most of the sag at the bottom of the posts will be hidden when they are set down into 'post holes' or grimed off depending on how you will mount the fence. I'm pretty happy with the way the boards lay out on the sides of the posts. There is pretty good depth in the fence.
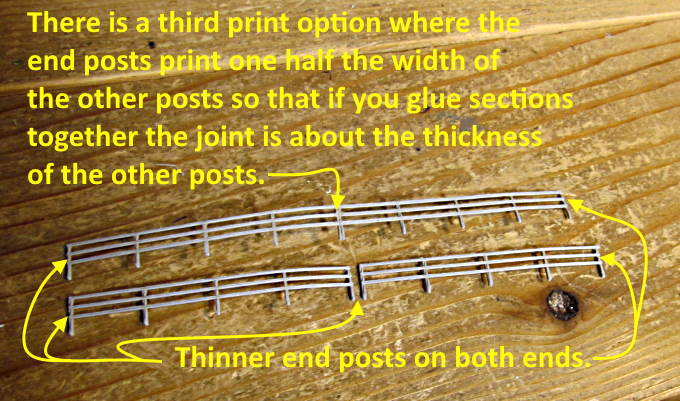
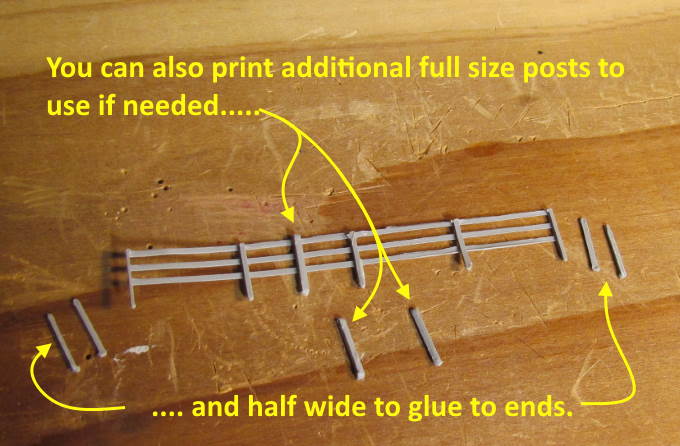
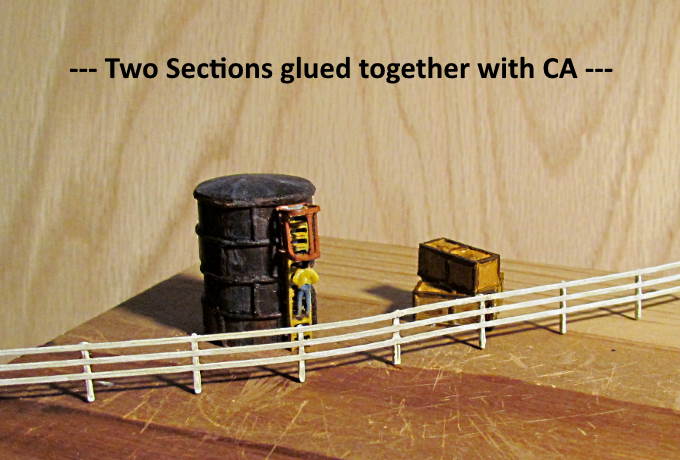
I decided to do a final print option where the end posts on the fence section are only half as wide as the posts in the middle of the section. This way when you glue two sections together the glue joint looks closer in width to the rest of the posts. I didn't do it above but I'd then fill the glue joint with Tamiya putty if you felt that was necessary but it probably won't be noticeable once the fence is painted and put in place.
You can also print out additional posts, both full size and half width. Glue the half width to the last half wide posts on your fence line to make them appear full width. Use the full width post for additional post where maybe another fence goes off at 90 degrees or if you cut a section short.
Above the bottoms of the posts haven't been cut off to lower the fence as they would probably go down into post holes on the layout.
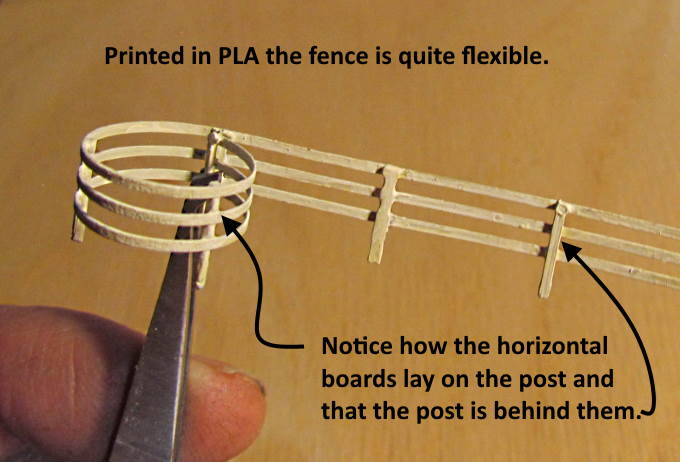
As you can see above printed in PLA the fence is quite flexible, so doesn't need to be used in straight lines. A lot of horse people have a circular coral that they use to exercise a horse in.
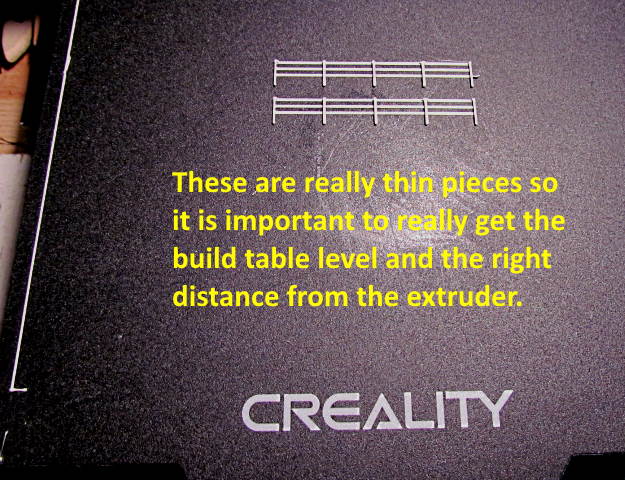
Take care to set your build table up well when printing these as they are very thin pieces and initial adhesion is more important than on larger objects.
Hopefully these will keep your livestock in the pastures or the kids out of your front yard.
You can find all the files to 3D print this object and others on my thingiverse.come account ( HERE ).
=========================================
...........................On..............e.........Next Page If There Is One