.................................. Return to Sumner's Home Page....
Return to N Scale RR Main Menu........... Return to Building UP's Canyon Division Menu
=========================================
...............Previous Page.............................Next Page If There Is One
=========================================
…...............................................--- Logstacker Build -- Pt. 2 ---
=========================================
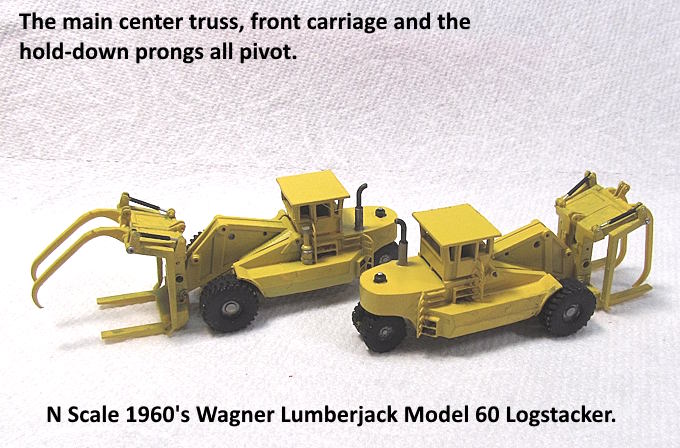
There isn't a whole lot to the logstacker build. There are only 4 parts, the body, main truss, front carriage, hold-downs and a bottom cover.
There is a cavity in the body where one can add weight. Probably needed it you are going to have logs in the carriage and it up in the air unless you are going to hold it down some other way. I put some BB's in but will get some smaller fishing weights or shot as that will fill the compartment better.
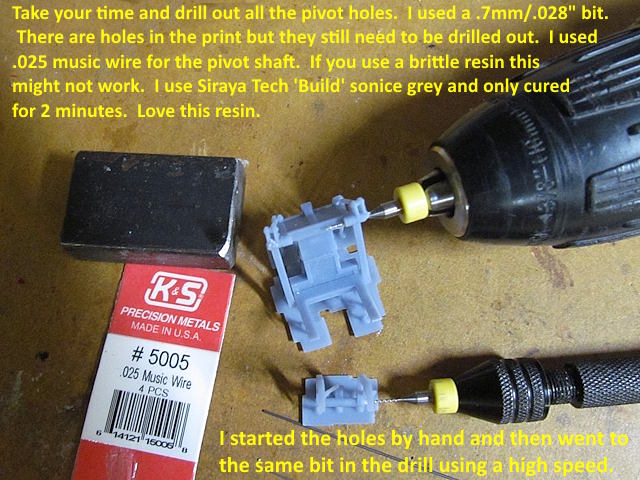
Drilling the pivot holes can be tricky especially if you are using a brittle resin (not recommended) I was drilling them all the way through by hand but then found that if I just drilled in a bit by hand to center the hole I could use a hand drill at a high speed. That worked great and no parts were broken. There are holes in the print file but they still clog some but do help you guide the bit through.
I use Siraya Tech 'Build' resin for all my prints. Never have problems with it and it can be drilled and tapped. I only cured these for 2 minutes in my wash-n-cure station. The 'Build' resin stays somewhat flexible for some time if you don't cure too long. I can say it works great for this model and everything else I've used it for.
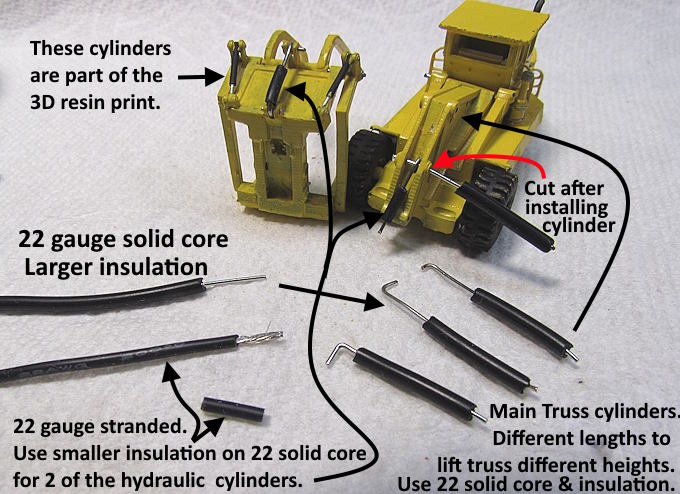
I used .025" music wire for most of the pivot points but also some .020" wire.
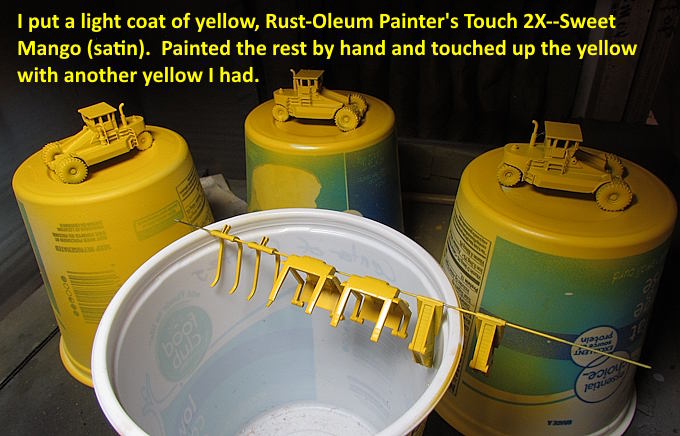
I was going to air brush the body and parts but got lazy and bought a can of spray paint. I find that most of the time I can mist a light coat on and have good coverage that doesn't cover up the detail with the newer paints. This one paints on all surfaces including plastic and worked fine for me.
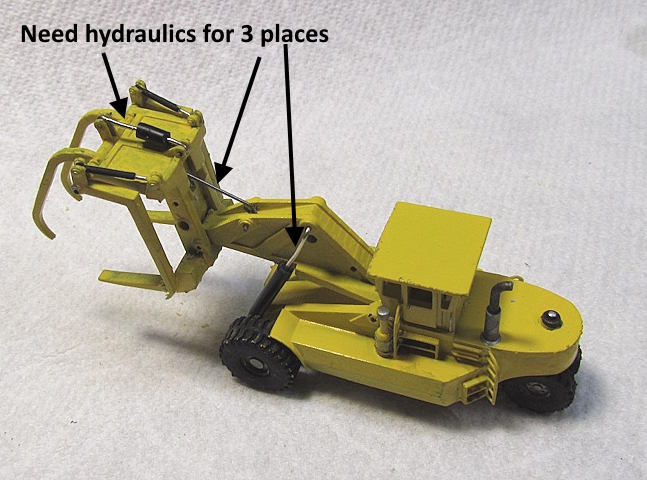
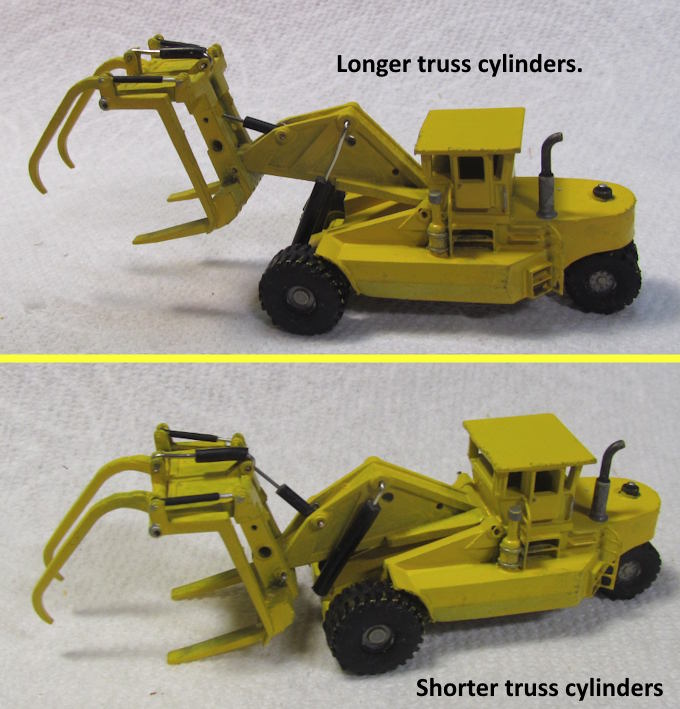
Three of the main parts can move. You could/can glue them in any position that you want or leave them movable.
With the three movable parts you can make hydraulic cylinders of different lengths to put the parts in different positions.
For now at least I made the hydraulic cylinder out of 22 gauge solid core wire for all of the centers. For the larger part of the cylinders I used the larger solid core insulation (left it on) for the larger main truss cylinders. The 22 solid core was also used for the other two cylinders but the insulation was removed and some insulation from 22 gauge stranded was slid onto the solid wire. This gives the impression that these cylinders are a little smaller than the ones used for the truss.
Two different lengths of the truss cylinders were made to hold it at different heights. More might be made in the future. Also the other two cylinders can be made in different lengths as needed.
I'm happy with how the model came out and again spent more time on it than I though I would going in. A big shout out to Autodesk for the ability to use Fusion free for the CAD work if you are a hobbyist. If you aren't commercial I really recommend it and if I was commercial I'd for sure pay the yearly fees to be able to use it. It is that good.
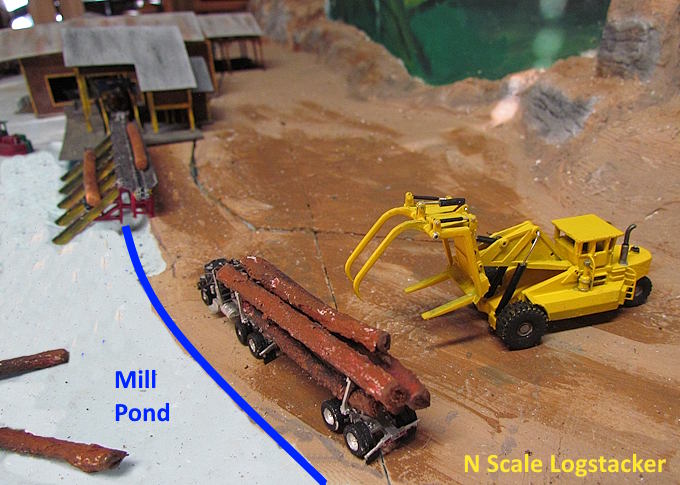
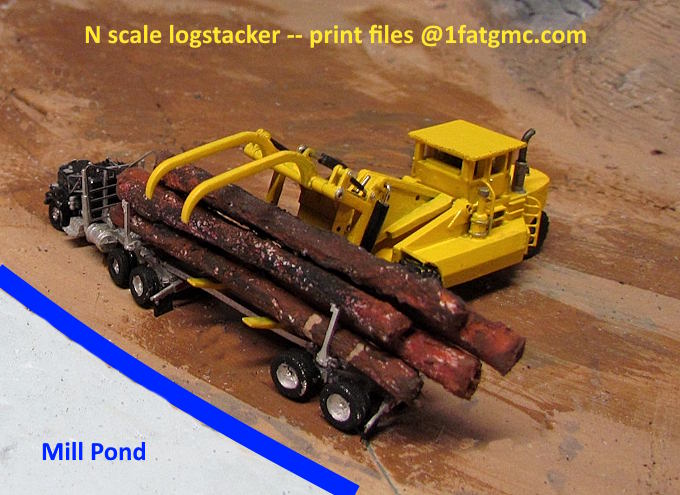
The model will be a nice addition to the sawmill scene and I think the mill is going to put in an order for a second one.
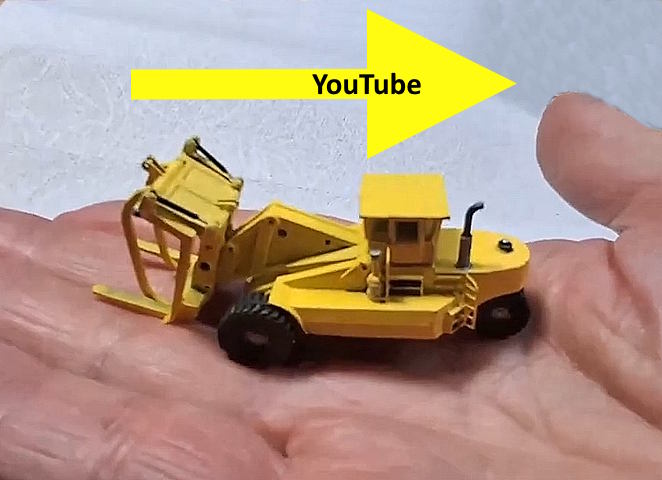
The logstacker is huge in real life but even a scale size is small in N scale as seen perched in the palm of my hand above. There is a short YouTube video ( HERE ).
You can find the print files on my thingiverse account ( HERE soon after I make a few minor changes for the hydraulic mounts).
To be continued and a link to this whole build ( HERE ).
=========================================
..………………………......Next Page If There Is One