...Return To Mine & Other Bonneville Car Construction Pages
.Previous Page...........B'ville Car Index Page...............Next Page
==================================================================
.......................--- Dzus Fastener Tools ---
......................................--- Page I ---
==================================================================
On this and the next page I'll show how to make a few tools that might help in installing Dzus fasteners. These tools aren't unique and you can buy some that seem to do the same thing, but you can make all of them easily and quickly for about nothing.
The next couple pictures show the tools and how to make them will follow on this page and the next page.
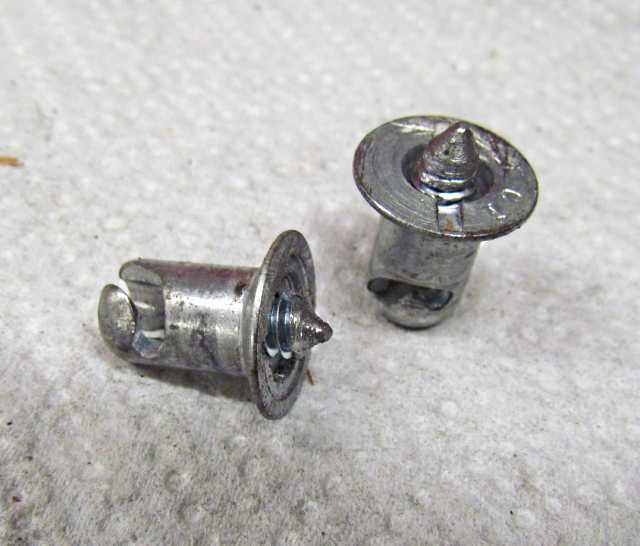
Above are some Dzus fasteners that have been modified. You can put them into the tab with the spring and lay the panel on top of them and hit is lightly and mark it where you need to drill.
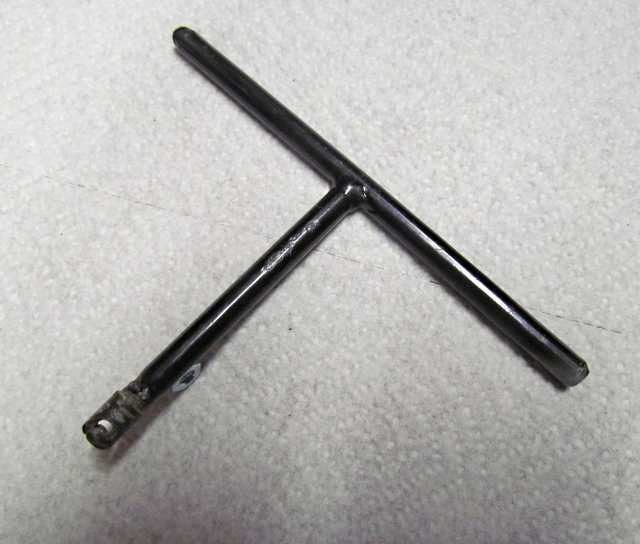
I copied the above tool from one my friend John Kimbrough made. If you need to adjust the spring in or out that is on the mounting tap you can use the tool to push or pull on the spring.
This tool makes it easy to put a dimple in aluminum or light gauge steel for the head of the Dzus fastener to recess into.
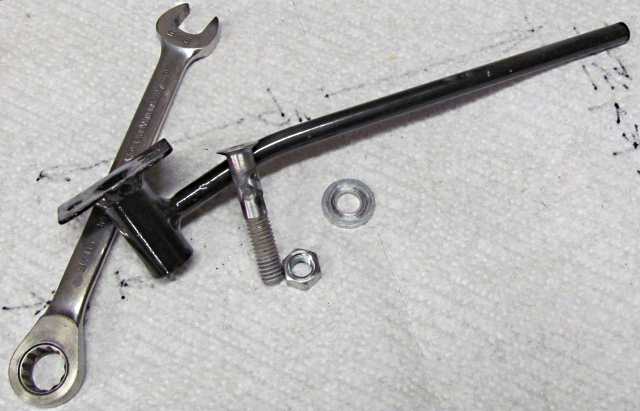
This tool I made and haven't seen one like it but I'm sure someone must of done something like this before. You attach the bottom piece to the tab with a Dzus fastener and then.....
.... place the panel in position. Next rotate the top two pieces around until you can push the very top piece with its indexing screw through the next two bottom pieces (indexing holes in them). At that point you can then mark the hole location from the top side of the panel.
Lets start with this tool on this page and cover the other ones above on the next page.
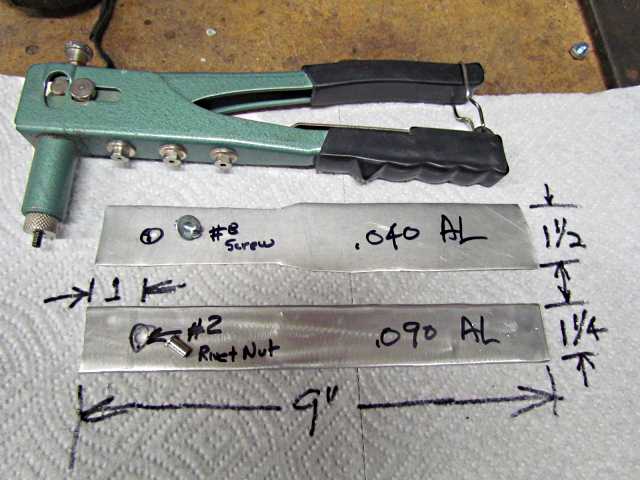
Start with pieces of metal similar to what is above. I had this on hand so used it. You do want the top piece which will become the bottom of the tool made out of something relatively thin and the other piece thicker and stiffer. The dimensions are not set in stone.
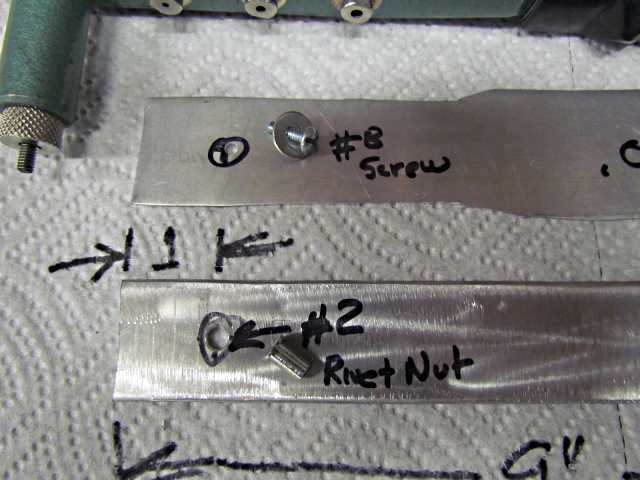
I drilled through both pieces at onec with the one centered on the other and used a 11/64 inch drill bit 1 inch in as that is a good size for the #8 screw. Then the thicker piece had its hole enlarged with a #2 bit and that is the size you need for the Rivet Nut threaded for the #8 screw.
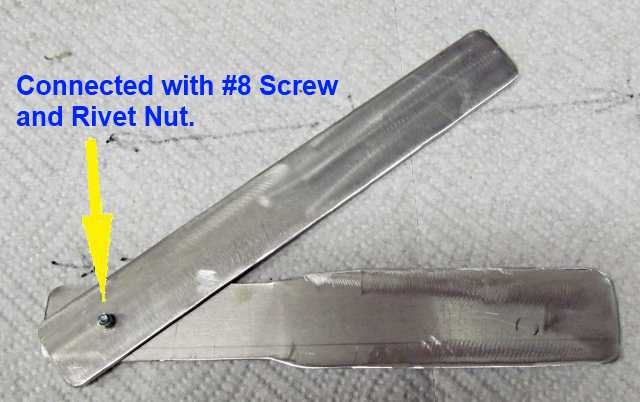
Above the Rivet Nut has been installed with the pop rivet tool shown above and the two pieces connected with the #8 screw.
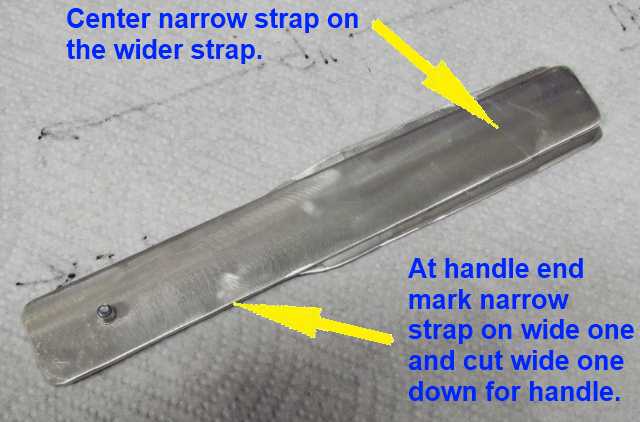
The bottom piece was kept wider on one end for strength purposes later when the tool is used as it is out of thinner stock. The end you will hold in you hand was reduced in width so that both pieces are the same width for comfort in using the tool. Center on on top of the other and scribe the narrower one's outline on the wide one at the handle end and then narrow it up.
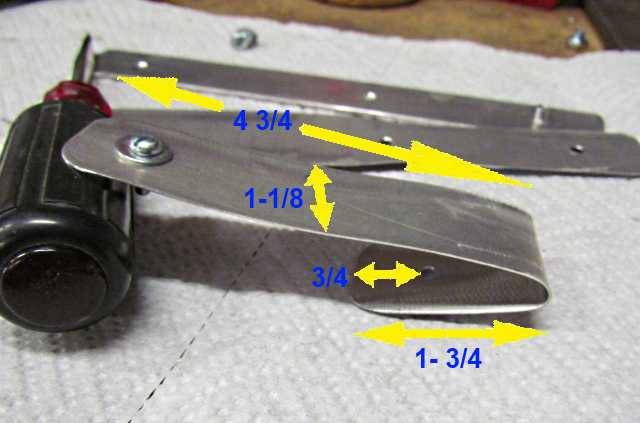
Next take a piece of the .040 aluminum that is 1 1/8 inch wide by 6 1/2 inches long and drill an 11/64 inch hole in one end 3/4 of an inch in. Then bend the piece 1 3/4 inches from the end with the hole. At this point forget the hole/screw at the other end. You will drill that end and put the screw in during the next couple steps--NOT NOW.

Again disregard for now the C-clamp and screw in the middle. I'm just showing how the Rivet Nut and screw hold the three pieces together at this point. Now we will deal with what is going on by the C-clamp.
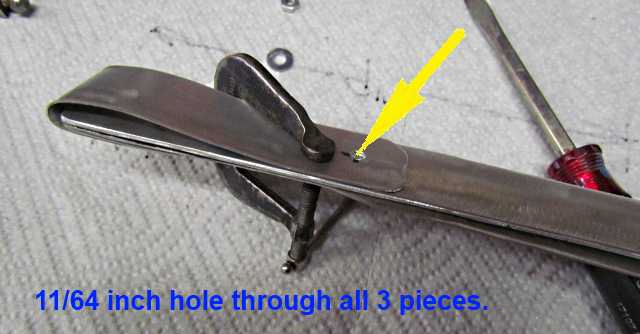
Bend the piece you made last over onto the other two pieces and clamp it. Then drill a 11/64 inch hole in the center about 1 inch back. Drill the hole through all 3 pieces. This will become the hole for a screw in the short piece and the indexing holes in the lower 2 pieces.
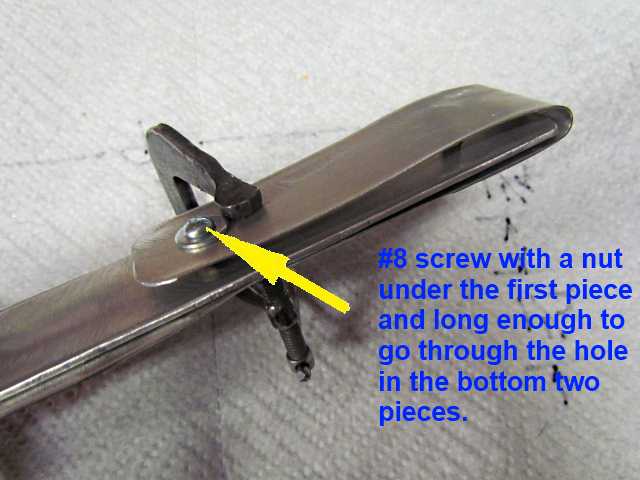
Now you can put a #8 screw into only the shorted bended piece as shown above.
At this point things should look like above. If the clamp wasn't there the top piece would spring up. When the bottom two are aligned with each other you will be able to push down on the top piece and push the indexing screw through the bottom two. For the next step lightly clamp the pices at the index screw like above.
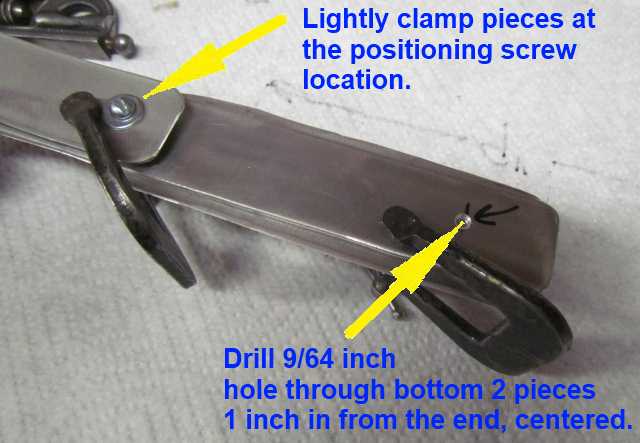
Then also clamp the other two pieces together near there ends and drill the 9/64 inch hole as shown above.
Above is an overview of the tool at this point and we are almost finished.
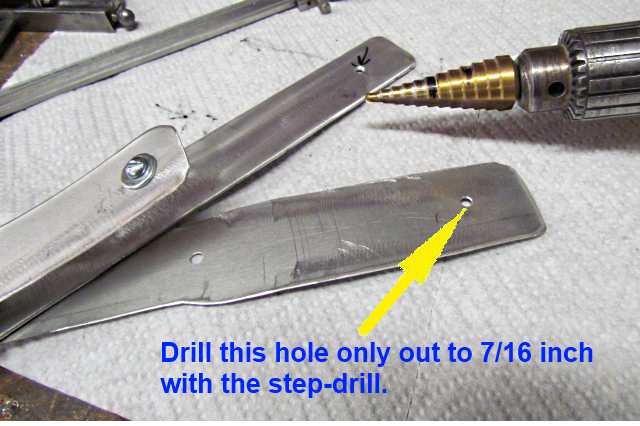
Spread the tool out and drill only the bottom piece out with a step drill to 7/16 inch.
The hole will be now dimpled with the tool shown above and detailed on the next page.
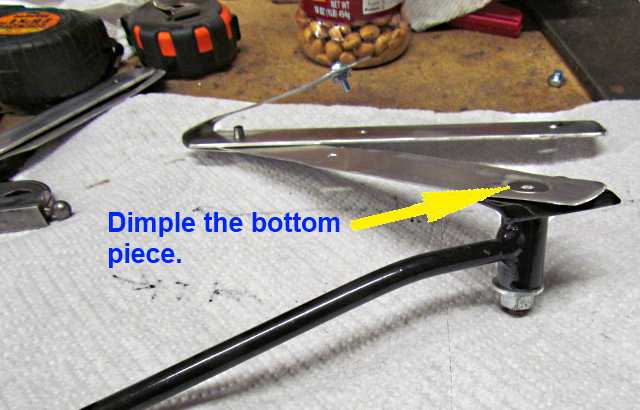
Above the hole is being dimpled with the 'dimple tool'.
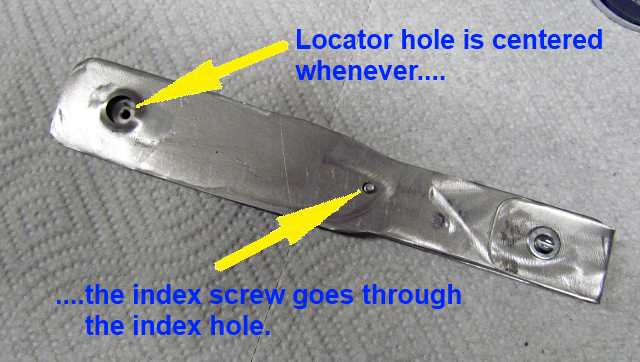
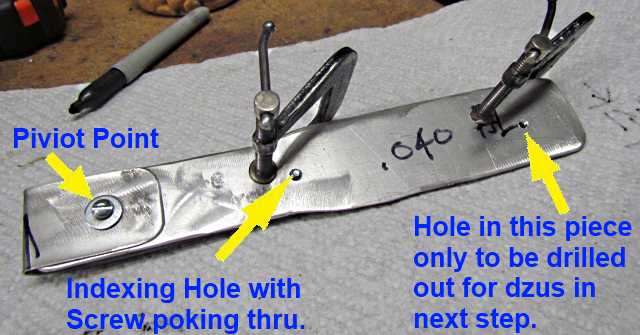
With the parts rotated into position and indexed we can see that our locater hole at the end of the tool is centered on the smaller hole in the piece that will be on top of our panel when we use the tool.
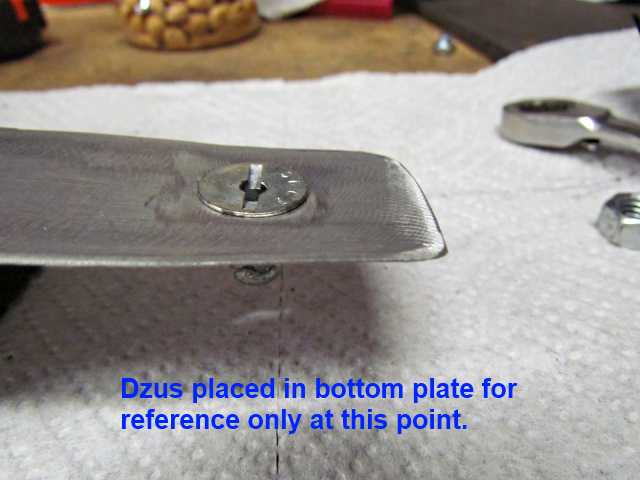
A Dzus fastener will be used to hold the tool in place when it is being used.
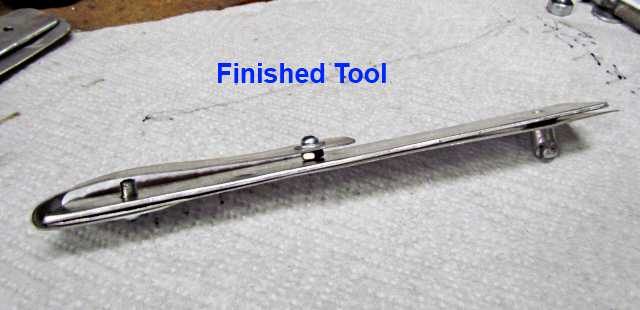
The finished tool shown with the bendable piece pushed down into the indexing hole.
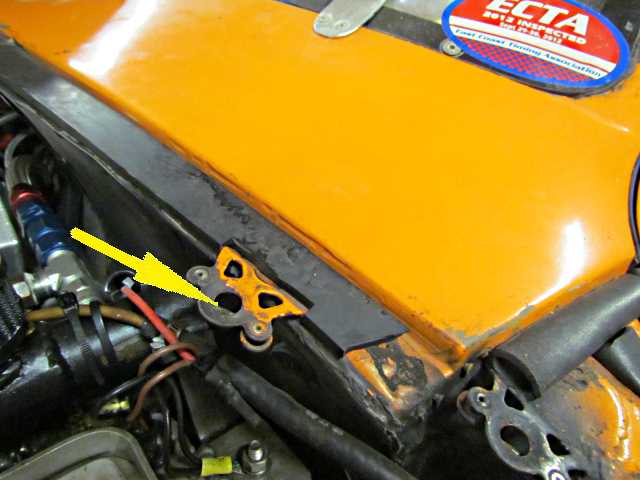
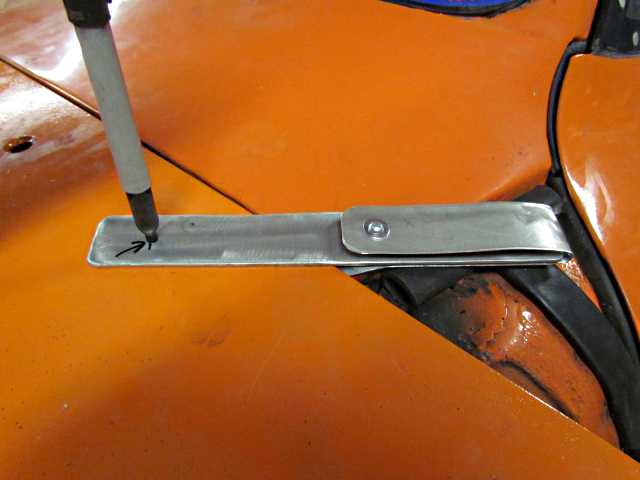
Let's look at how the tool could be used to find where our hole is in the panel that will be above this spring pad.
Take a Dzus and attach the tool's bottom piece to the tab.
Rotate the tool around to the point where you can push the indexing screw down and through the bottom two straps. Next take a marker and mark the location of your hole.
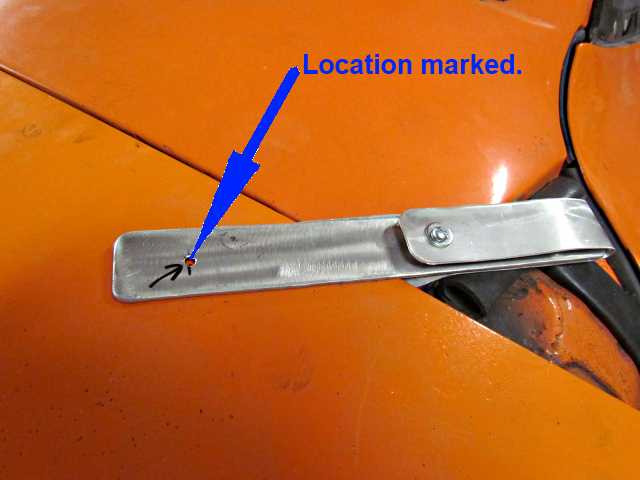
Once you have marked the location of the hole remove the tool and the panel and drill it. Pretty simple,
Sumner
==================================================================
Next Page... Next Page