........................Endeavour Index Page............Plumbing Mods Index Page
....................................Previous
Page..............................
Next
Page If There Is One
===================================================
.................................--- Holding Tank Vent Filter --
===================================================
In addition to adding a larger holding tank we wanted to also install an active charcoal filter to the vent for the holding tank. We could of bought one but I felt we could make one that worked just as well and would fit the space we had available for one.
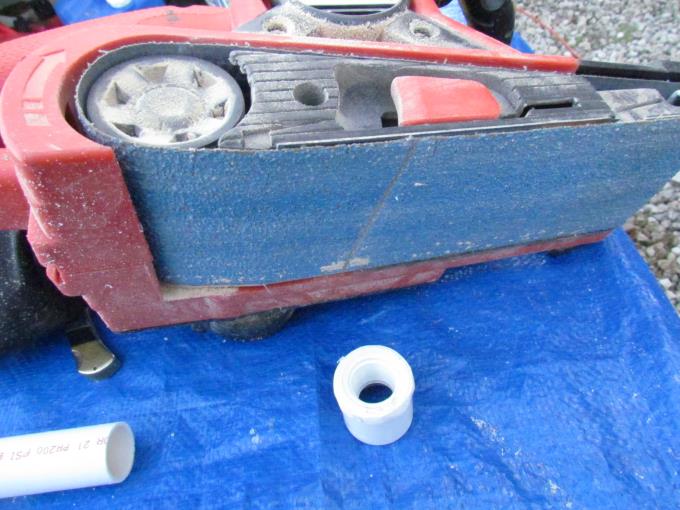
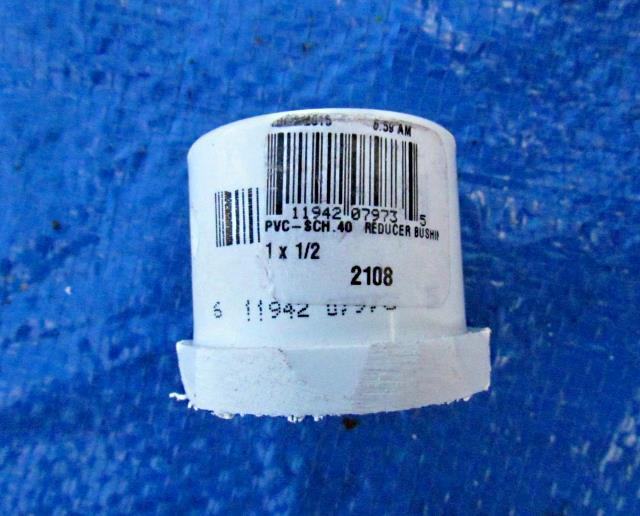
If you are interested in making one also take your time looking at the pictures here and realize that you might want to modify some of the parts if you have different needs. I started with the piece above and ....
...... reduced the size of the larger outer surface on one end. Two of these were made for both ends of the filter and they act as a plug that will help hold the charcoal in yet let the vented air pass into and through the filter.
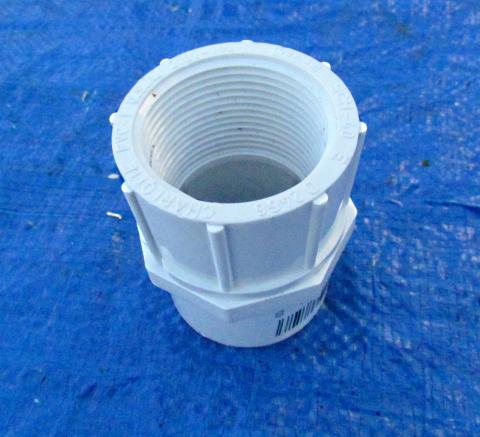
Next up was the fitting above. This will all come together as you work on down the page.
The first piece needs to be reduced in size to the point that it will pass through the fitting above.
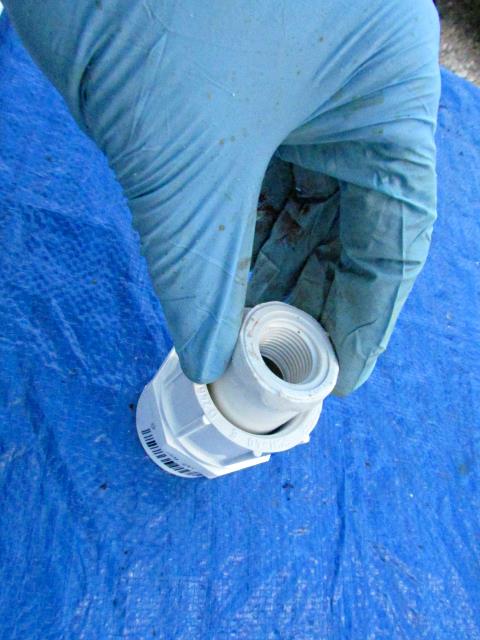
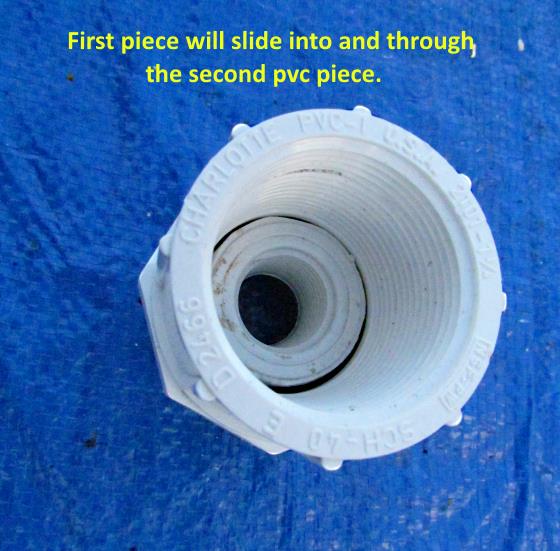
The first piece will end up sliding through this piece as shown above.
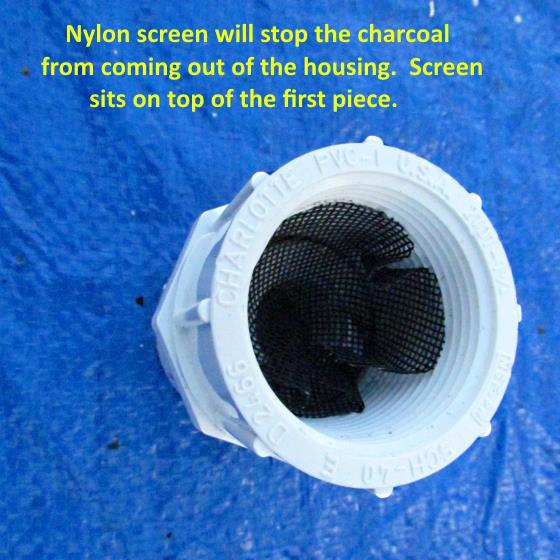
It will slide in towards the part of the filter holding the charcoal and then the screen netting will be placed above it. The netting will stop the charcoal from coming out the ends of the filter.
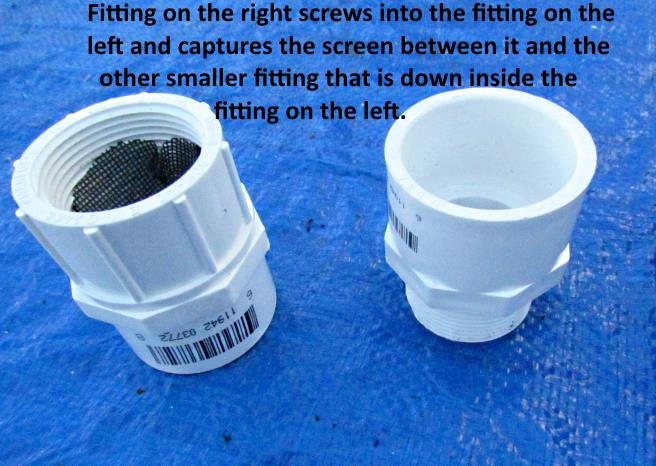
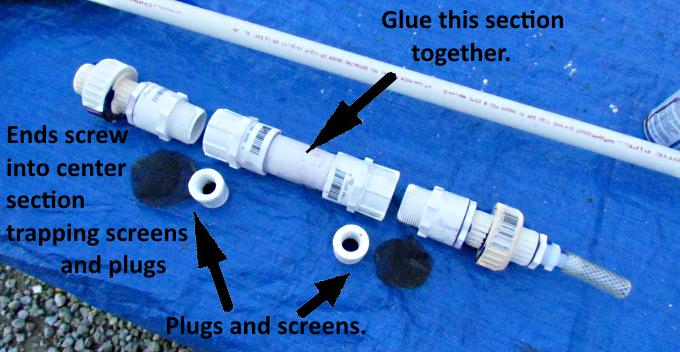
The next piece will screw into the other one and trap the screen between them.
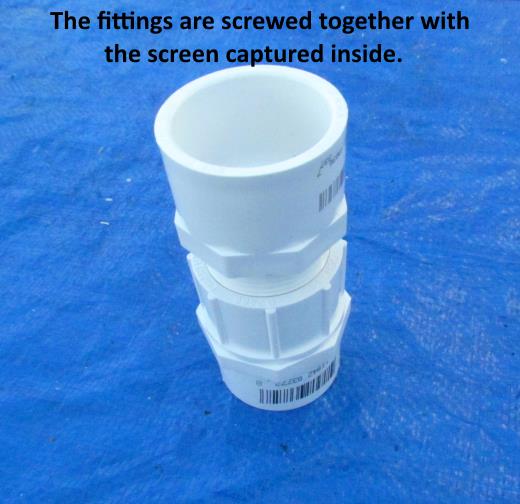
Above the two are screwed together with the screen between them and the first smaller plug below the screen.
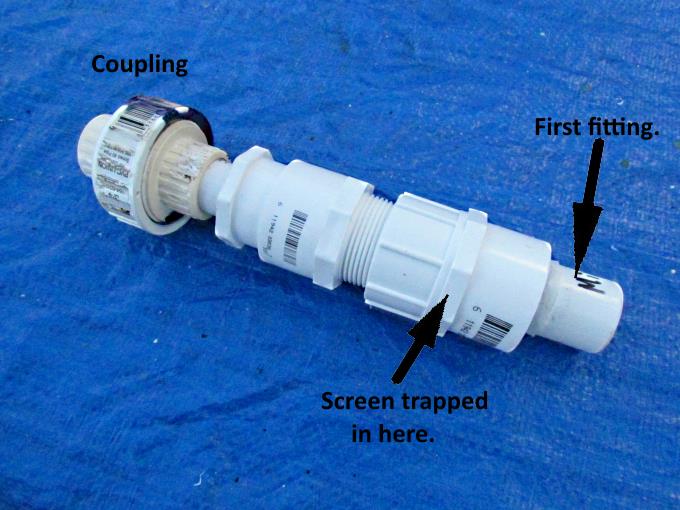
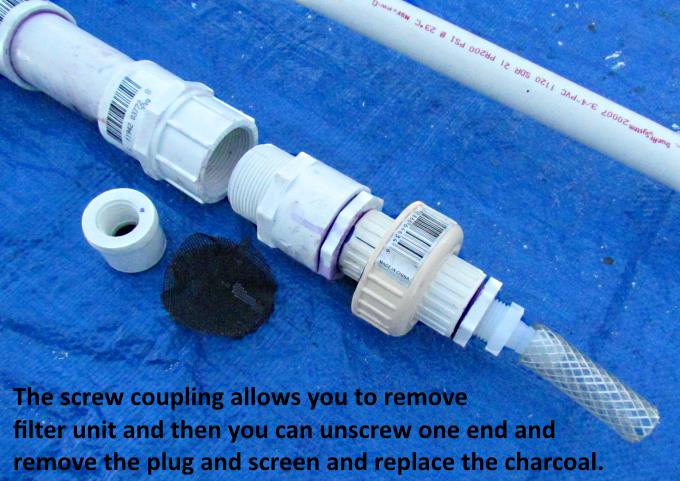
PVC fittings are added to the one piece. One is a coupling that screws together and allows the filter to be removed from the vent line that attaches to this end of the filter and a duplicate piece to the one above will be the other end of the filter.
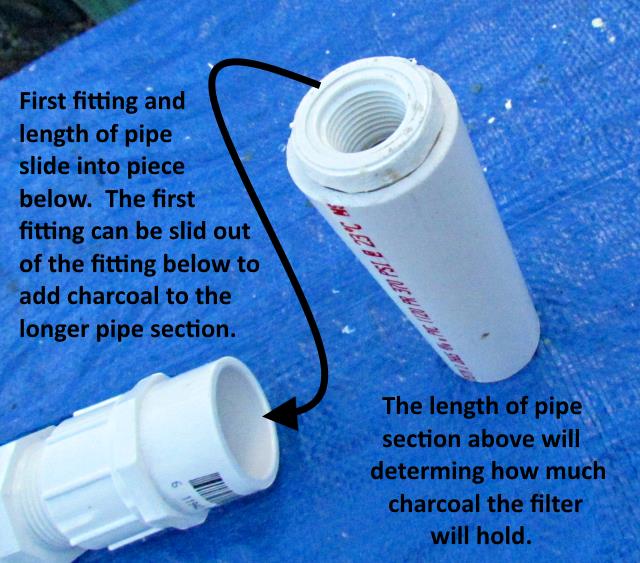
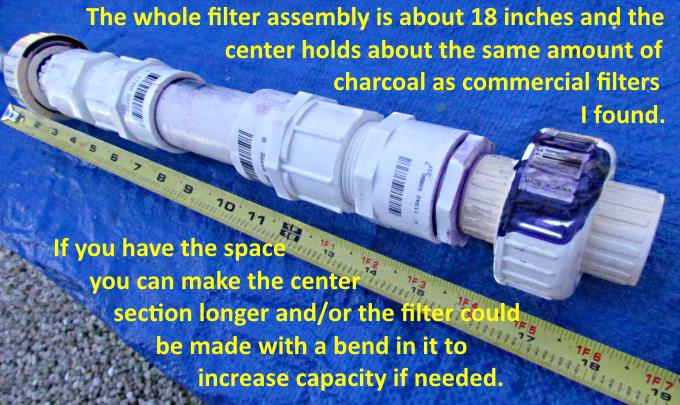
To the right above is the piece of pipe that will house the charcoal. How much charcoal the filter holds will be determined by the length of the piece of straight pipe. Notice the plug that was made in the first two pictures above won't slide into the pipe put it will slid into the piece to the left. The screen is just above the plug. It really isn't a plug since it has a hole down the center. Its purpose is to hold the screen on one side.
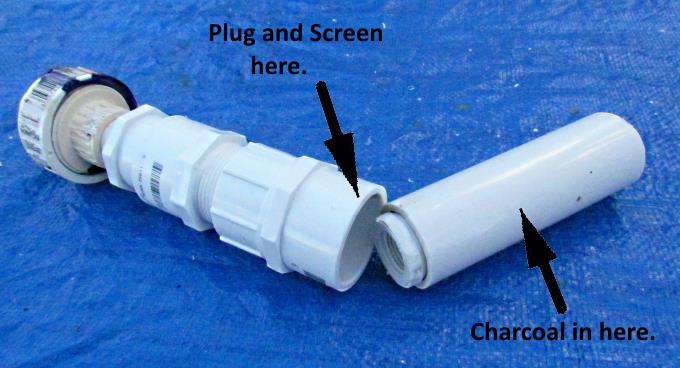
Another view of one end of the filter and the center section where the charcoal will reside.
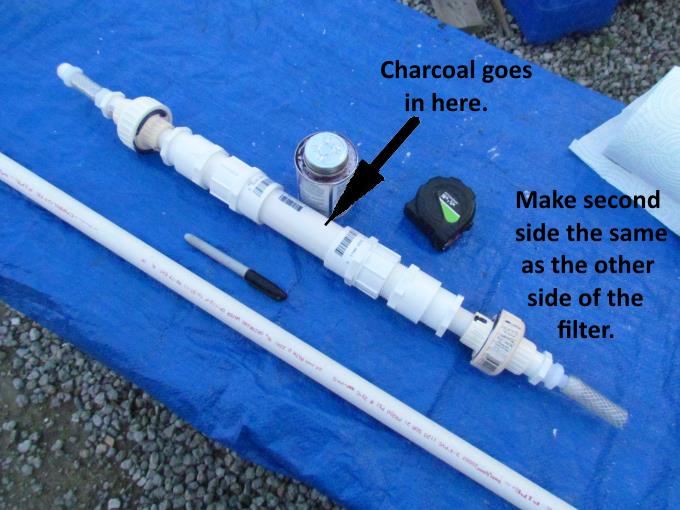
Above we see the completed filter.
To fill it you just need to unscrew one end from the center section and first remove the screen and then the plug. Next fill the center with the activated charcoal (pet shops sell it). The plug and screen on the opposite end will keep the charcoal from going out the other end. With the center filled put the plug in and the screen in the other end and screw it together.
.
.
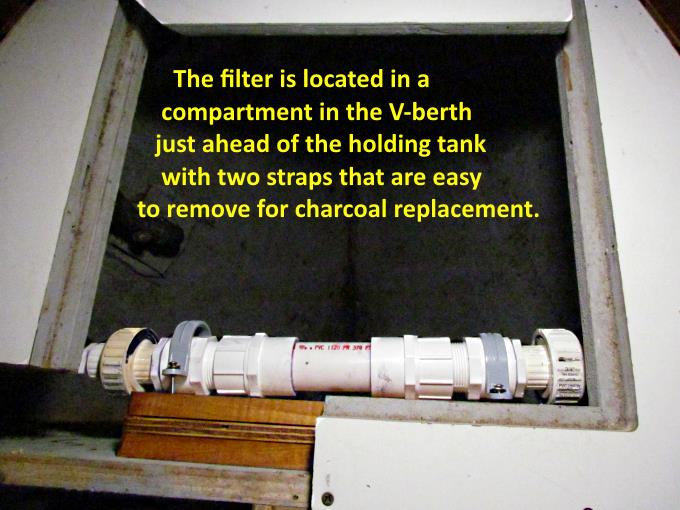
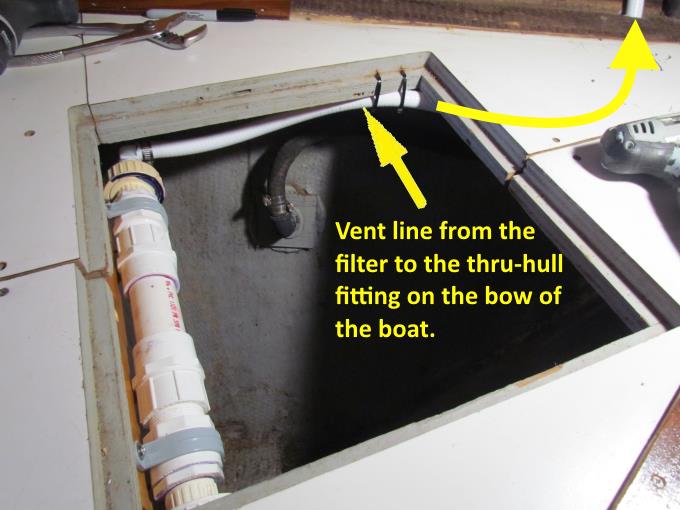
The filter was mounted in a convenient location for servicing later.
It is in a forward compartment under the V-Berth bed and mounted with two straps that are easy to remove. Unscrew the couplings on both ends and it comes right out for servicing.
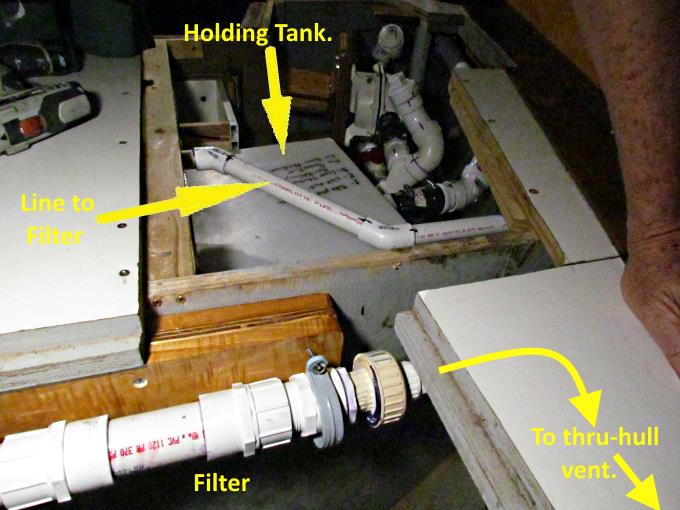
The tank has a vent fitting on the top on the port side of the boat. There is a flexible fitting on the tank and then the small diameter pvc pipe takes over the venting to the filter where there is another short section of flexible hose.
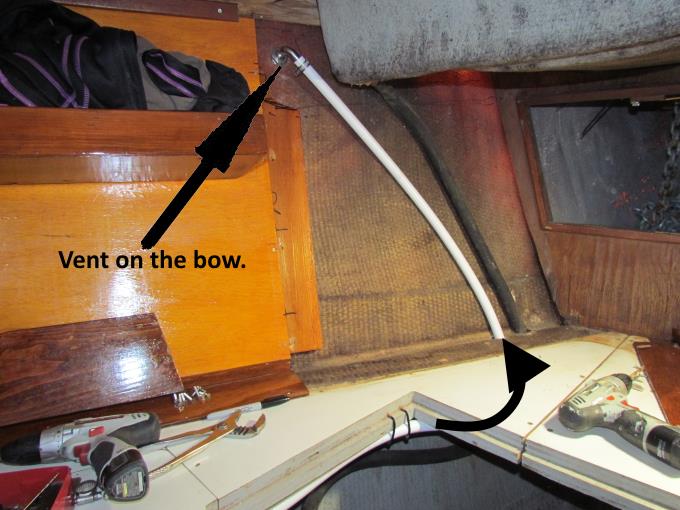
A sanitation vent hose exits the other side of the filter and ...
.... goes up to a thru-hull vent on the port side of the bow of the boat. This should give good odor free ventilation for the holding tank.
================================================
............................................................................. Next Page If There Is One